Home Improvement, DIY
3 Simple Steps to Protect Your Wood this Winter Season
Dec
3 Simple Steps to Protect Your Wood this Winter Season.
3 Ways to Waterproof Wood
That natural beauty demands protection! Choose the products and techniques that work best with your wood.

Photo: istockphoto.com
Some of the most delightful furniture, cabinetry, and trim work are crafted from wood, the world’s oldest and best-loved building material. Without protection, however, most wood will suffer from exposure to moisture and high humidity, resulting in swelling, warping, or even rotting. You might even find that some pests try to destroy your wood. That’s why if you find you have woodworm, bring in specialists fast! Protecting your wood is easy if you know exactly how to do it. Fortunately, you can easily avail yourself of products that protect wood while enhancing its natural beauty. When choosing the best method for waterproofing wood, remember that not all waterproofing products are the same—some are better suited for interior or exterior items, while others are geared towards dark- or light-grained wood. Here, we’ve outlined the three surefire ways to preserve your wood for years. If you want to keep wooden logs safely stored in winter, look at sites like Gardensite for log storage products.

Photo: istockphoto.com
CREATE A WARM HAND-RUBBED OIL FINISH
Linseed oil, derived from the seeds of the flax plant, and Tung oil, extracted from the Chinese Tung tree, are the basis for nearly all hand-rubbed (a.k.a. wiping) oil finishes. Employed for centuries, these oils beautify and protect such dark-grained woods as walnut and mahogany, and they’re still in use today—with a few improvements. Blending the oils with other ingredients hastens drying times and eliminates stickiness. You can purchase pre-blended Tung and linseed products or mix your own for a custom finish.
A standard hand-rubbed oil blend consists of one part oil (either Tung or boiled linseed), one part mineral spirits, and one part polyurethane varnish. Stir thoroughly before applying dark-grained wood that’s been sanded and cleaned with a natural bristle paintbrush. (If looking for lighter color waterproof wood, such as pine or ash, skip this method in favor of one of the next two; hand-rubbed oils tend to yellow over time.) Let the oil soak into the surface, and reapply to any dry spots. Then wipe off the residual oil, rubbing well with clean, dry rags to remove all excess. Allow the wood to dry completely; this can take anywhere from a few hours to overnight, depending on the degree of oil in the mixture. Finally, sand lightly with a fine-grit sandpaper. Repeat the process with as many additional coats as required to obtain your desired finish.
As you become familiar with oil-rubbed blends, feel free to experiment with the formula. For a thicker product, reduce the amount of mineral spirits. If you’d like more working time before the finish dries, reduce the amount of varnish. Add more varnish for a glossier finish and quicker drying time. You can create a multitude of custom blends!
Note: Oily rags that rub away excess oil can spontaneously combust—yup, even without being near flame, because as the oil dries, it generates heat. Take precautions by keeping a bucket of water handy while working; as a rag becomes oil-saturated, drop it in the bucket and continue with a clean rag. Later, hang rags out to dry separately. When completely dry, you can throw them away without risk, but rags should not be reused.

Photo: istockphoto.com
USE SEALANTS FOR BEST PROTECTION
Polyurethane, varnish, and lacquer are tried-and-true sealants with excellent waterproofing properties. They’re either brushed or sprayed onto clean, sanded wood and allowed to dry completely; then, the piece is lightly re-sanded and recoated. For best results, apply in a “room temperature” environment and never shake or briskly stir sealants before application—that can cause air bubbles that would remain on the surface, even after the sealant dries. Though drying relatively quickly (some in as little as 15 minutes), these sealants often contain chemical solvents, so ventilation is necessary during application. Read on for the pros and cons of these popular sealants.
• Polyurethane sealants, which contain various amounts of solvents in addition to acrylic and polyurethane resins, let you choose your favorite finish effect, from a high gloss shine to a gentle soft sheen. Today’s polyurethane won’t yellow, so it’s a good choice for light-toned woods. Oil-based polyurethane offers the greatest durability, but brush cleanup requires mineral spirits or turpentine. With water-based polyurethane, cleanup is a snap with soap and water.
• Varnish, a combination of resin, solvent, and drying oil, gives a hard-shell finish that resists scratches without yellowing. To waterproof wood that will be placed outdoors, choose marine varnish, which contains UV absorbers to resist sun damage. For interior use on end tables and coffee tables, spar varnish is a good choice to resist pesky cup rings. Clean brushes with turpentine or mineral spirits.
• Lacquer, a mixture of dissolved tree resin or synthetic resin in alcohol, is the sealant for indoor hardwood furniture. While it can develop a yellowish tinge over time that’s considered unattractive on lighter woods, lacquer brings out a rich, warm, scratch-resistant finish on deep-toned wood. It’s available in various sheen choices and can be thinned with lacquer thinner. For optimum results, apply lacquer in multiple light coats. Note: Lacquer emits strong fumes, so ventilation is absolutely essential; work outdoors or open windows and use fans.

Photo: istockphoto.com
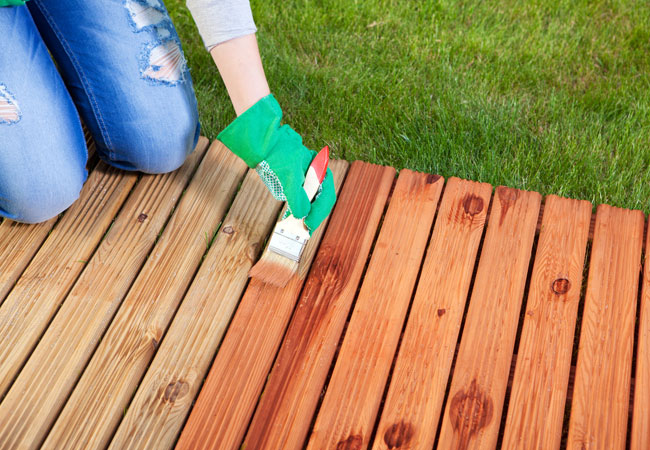
WORK FAST WITH STAIN-SEALANT COMBOS
When time is of the essence, or you’re protecting a large project, such as a wood deck, go for a stain-sealant combo. These multitasking products add color while providing water resistance in a single step. Stain-sealant products contain color pigments with the addition of binders, which can be oil-, water- or alkyd-based. Depending on the product’s pigment concentration, the final result can be transparent, opaque, or in-between. If applying a stain-sealer to exterior wood, you’ll want to reapply every year or two to keep the wood protected.
With the exception of alkyd-based products, stain-sealants don’t build up on the wood surface; instead, they soak in, and any excess evaporates. Alkyd-based stain-sealants leave a light surface coating on the wood, making them better suited for interior wood items, such as indoor exposed beams or rustic furniture, that won’t require future applications. Outdoors, alkyd-based stain-sealers have a tendency to peel if the wood isn’t perfectly clean and dry when applied.
Curated from Bob Vila
There is clearly a lot to know about this. I think you made various good points in features also.